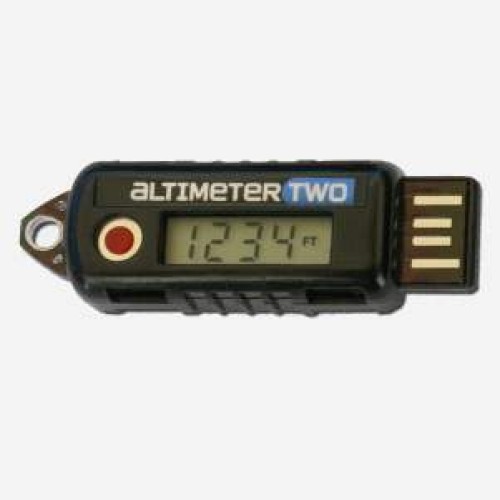
Altimeter Two by Jolly Logic
- Brand: Jolly Logic
- Product Code: JOLLYTWO
- Availability: In Stock
Price:$79.00

Description
A rechargeable digital altimeter (for model rockets only) that analyzes flight altitude, acceleration, top speed, flight duration and 6 other important flight statistics.
The AltimeterTwo retains the rugged design, easily-readable LCD, small size, and rechargeability of the AltimeterOne. With the addition of a 3-axis accelerometer and a 4X speed increase in processing speed, it can provide a full suite of important flight statistics that can help you analyze and improve your rocket’s performance.

(Click the image for a larger view.)
Features
- » 3-axis, 24g accelerometer can detect launch, acceleration, speed, ejection, and landing
- » Accurate 19-bit barometric pressure sensor sensitive to altitude changes of less than one foot
- » Daylight-readable LCD display clearly displays all flight statistics−no computer needed
- » Rechargeable Lithium Polymer battery lasts for hundreds of launches, no batteries to buy
- » Recharges in less than 2 hours from any standard USB port, no cable necessary!
- » Samples pressure over 30 times/second, and acceleration over 244 times/second
- » Power button turns device ON/OFF and RESETs the display between flights
- » Automatically powers down to conserve power
- » Handy tether point allows secure attachment, or independent streamer recovery
- » Rugged fiberglass and ABS construction to survive crashes
Size and Weight
|
English
|
Metric
|
|
|---|---|---|
| Size | 0.47″ x 0.64″ x 1.93″ | 12mm x 16mm x 49mm |
| Weight | 0.24 ounces | 6.7 grams |
Range and Precision
|
English
|
Metric
|
|
|---|---|---|
| Max Altitude (above sea level) | 29,500 feet | 9000 meters |
| Max Acceleration | Minimum of 23 gees Maximum of 40 gees (careful mounting) |
Minimum of 23 gees Maximum of 40 gees (careful mounting) |
| Altitude Precision | Nearest foot below 10,000 Nearest 10 feet above 10,000 feet |
Nearest meter |
| Acceleration Precision | Measured to nearest 0.0007 gee Displayed to nearest 0.1 gee |
Measured to nearest 0.0007 gee Displayed to nearest 0.1 gee |
| Speed Precision | Nearest MPH | Nearest KPH |
| Timing Precision | Shown to nearest 0.1 second | Shown to nearest 0.1 second |
Simple Instructions
Just want the basics? Here’s how to use the AltimeterTwo, in as brief a form as possible:
1. Press and release the button quickly to turn the AltimeterTwo on or off.
2. Clear and reset for the next flight by holding the button down and releasing it when “0000″ appears.
3. View detailed information from the last flight by holding the button down and releasing it when “dAtA” appears.
4. Recharge by plugging it into a USB port on a computer. Make sure a red light appears when you plug it in; take it out after the green light appears.

AltimeterTwo User Guide
Step-by-Step Tour
Here’s a detailed walk through of how to operate the AltimeterTwo.
Turning It On and Off
Press the button and release it quickly to turn the AltimeterTwo on and off. Even though the button is small, you don’t have to use a sharp object to press it. Just press it with the pad of your finger, and it will “click.”
Accessing the Menu
If you press the button and continue to hold it down, you will be presented with a series of choices on the screen, one after another, which you can select by letting go of the button.
Resetting for the Next Flight
![]()
If you hold down the button and let go when you see “0000″, you will clear the results of the last flight and the AltimeterTwo will be ready for the next flight. On the screen, you will now see an animated “0″ like this:
![]()
After the Flight
The AltimeterTwo will automatically display the apogee and top speed of each flight. The display alternates between showing each.
![]() . . .
. . . ![]()
Detailed Flight Data
To see the additional flight statistics from the most recent flight, hold down the button and let go when you see ![]() . The flight statistics are presented one after another. You can interrupt at any time by pressing the button to exit the detailed display.
. The flight statistics are presented one after another. You can interrupt at any time by pressing the button to exit the detailed display.
Here are the screens you will see when you select the “dAtA” option:
|
Statistic
|
Screen
|
What It Means
|
|
|---|---|---|---|
|
1
|
Burn Time
|
The length of time (in seconds) that the engine produces thrust
|
|
|
2
|
Peak Acceleration
|
The maximum rocket acceleration during engine burn (in Gs)
|
|
|
3
|
Average Acceleration
|
The average acceleration from ignition until motor burnout (in Gs)
|
|
|
4
|
Coast to Apogee Time
|
The delay between motor burnout and the moment of highest flight (in seconds)
|
|
|
5
|
Apogee to Ejection Time
|
The time between the peak of flight and parachute ejection; can be negative if ejection is on the way up (in seconds)
|
|
|
6
|
Ejection Altitude
|
The altititude at which the parachute is ejected (in feet or meters)
|
|
|
7
|
Descent Rate
|
The average vertical speed from ejection to landing (in MPH or KPH)
|
|
|
8
|
Duration
|
Time of flight from ignition to landing (in seconds)
Time of flight from ignition to landing (in seconds) |

